Tuesday, June 28, 2016

Stateside Travel Journal #DCWV

Now that we've celebrated Dads and Grads, it's time for a road trip.  I put together the 6" x 8" travel journal from the Stateside Collection for a road trip this Summer.


I first covered the front and back covers of the album with paper from the 12" x 12" Stateside Premium Stack.  I choose 4 different pattern papers and trimmed them down to 6" x 8" to fit the front and back side of the album covers.  Before gluing the covers, I glued the ribbon to the front and back covers with a generous amount of Mod Podge.  The ribbon ties  will help keep the journal closed.


The travel journal kit has plenty of pages, pockets, stickers, washi strips and die cuts, but I added a couple more pages and fun sayings from the 12" x 12" cut out sheet.  Here is the front cover:


Here are a few of the pages.   I will be using the tag and journaling cards from the same collection through out my journal.


I will be taking the extra tags and journaling tags in my tote along with the remaining stickers. 

Do you have any trips planned this Summer?  Please share how you plan to journal your trip in the comments below.
Thank you for visiting today.


Monday, June 27, 2016

Handprint Cupcake Birthday Card

I am beyond excited to have a very special and talented guest designer today.  She is the artist of Sabor Papel, please welcome Crystal Dominguez.


Handprint Cupcake Birthday Card
By Crystal Dominguez


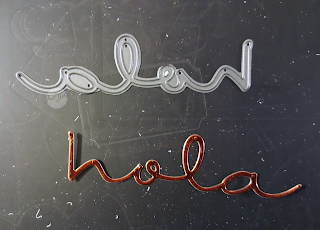
Hola! I’m super excited and honored to be a guest designer on JustYolie today! 
Today’s project is a fun and colorful card simple enough for even the youngest of crafters with a little help from Mommy. I designed this card with little crafters in mind and knew I wanted to have my youngest son help me. He will be two next month and loves crafting!


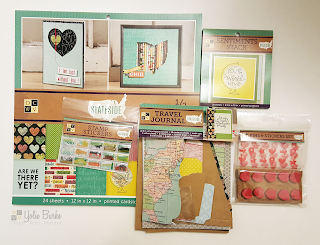
I used the following supplies to create this cute card: Sorpresa and Burrito paper from the Olé collection by Sabor Papel, Sabor Papel Cutouts, solid colored cardstock, acrylic paints, E6000 Allure gloss dimensional design paints, glitter glue, powder puff inks by Quick Quotes, border punch by Martha Stewart, and various brings and trims from Michaels.

First, I cut the solid colored cardstock into a 4x4 inch square. I choose this fun bright green color. Next, with the help from my little boy Vincent, we painted his hand with yellow acrylic paint and made his handprint. This will be the base for the candles and cupcake. 

Then, using the dimension paints and glitter glue, I decorated the candles and added flames to the top of each one. I wanted to keep my little crafter involved so I let him help me by choosing the colors I used. He enjoyed watching his handprint turn into a cupcake with candles!

To really make this handprint look like a cupcake we needed a cupcake liner. So I made a template of what I think resembles one and then used it to cut the liner out of the colorful flower paper, Sorpresa by Sabor Papel. I used a pretty border punch to add some interest to the liner. Once the handprint and candles were dry I used some pop dots to attach the liner to the bottom of the handprint. I also added some bling to the cupcake to represent sprinkles.

I love this flower pattern from the Sorpresa paper so I used it for the base of my card. I cut the 12 x 12 down to 10 x 5.5 inches and folded it in half to create the card. I used some pretty yellow trim from Michaels to frame the green cardstock with the cupcake. It added a nice touch. I love glitter, trims and blings! 

Finally, I added the Celebrar! cutout from the Olé collection to the lower right corner of the birthday card. Both Vincent and I are happy with the way it all came together. I hope you've enjoyed my tutorial and I've inspired you to craft with your little ones too!

Love and Blessings,
Crystal

Be the Light #Craftwell x #LatinaCrafter

Is it just me or did June flew by?  The 4th of July is just around the corner.  Today is my last project share with this month's sponsor, Latina Crafter.


I used watercolor makers with my eBrush.  I used heavy weight cardstock instead of watercolor paper.  I eBrushed 3 different colors on the paper and sprayed water, dabbing off the excess with a paper towel.  Once it dried, I sprayed a very light shimmery gold to the surface.


After it completely dried, I stamped the lighthouse and sentiment from the Be the Light  stamp set.  I first stamped with the Journey Gold ink.  I then stamped the images again with black, but moved the image slightly over to the right to create a shadow.    

I embellished with flowers, sequins and tied jute to the top.  I used 3D Gloss Gel to adhere the glass beads to the bottom of the card.


 This photo captured the shimmer of the ink pad.  It really does look amazing in person.


Thank you for visiting today.


Wednesday, June 22, 2016

Dia de Muertos Wedding Center Piece #SaborPapel

Welcome to the final project for the Wedding Wednesday segment with Sabor Papel.

Today's project is a center piece using a small molcajete.  I used several pattern papers from both Olé and Amor collections.  I also used the following:  a small floral styrofoam, floral wire, hot glue gun and flower dies or flower patterns.


I cut several of the small flowers on the Cut N Boss using a Spellbinders flower die.  I also used my Cricut Explore to get the larger flowers.  Before I assembled the flowers, I made two cuts at the base of the flowers and inserted a strand of floral wire.  I then assembled the flower, added a bit more hot glue than usual to secure the wire. 
I then added a die cut sprig to the base of the flowers.


I used the larger flower at the top center and added the remaining flowers to around it.  This molcajete measures about 6" in diameter.

Here's a close up of the flowers:


This is also my last project for Sabor Papel.  Thank you Team Sabor for inviting me to take part of such an amazing talented Team and for the opportunity to play with your gorgeous paper.
¡Gracias!

Friday, June 17, 2016

Father's Day #eBrush x #LatinaCrafter

Hello and happy FriYay!  I just love when my favorite brands come together.  Latina Crafter is sponsoring the Craftwell team this month so double yay!!


So let's get ready to celebrate Father's Day weekend.  Today I am sharing the card I made for my 77 year old Dad.

I used a stencil out of their "Eres el mejor papá" collection with my eBrush.  I used pattern paper from DCWV The Treasure Stack.  The brick wall pattern was screaming for some graffiti! {Well, you know, kinda sorta with the help of a stencil.}


I secured the stencil with painters tape and masked off the letter 'P'.  I call my Dad Apá so it was only fitting to exclude the first letter.  By doing so, it threw the alignment off, but it's okay, I fussy cut the  couple of license plates from the cut out sheet and used them to embellish and "fix" the alignment.  

Before adding the top layer I tied some jute around the brown base and then used Glue Dots to adhere the top layer for dimension.
Thank you for visiting today and enjoy your weekend!

Tuesday, June 14, 2016

Boho Style DIY Notebook #DCWV

There is a NEW DCWV Stack in town!!  Introducing The Boho Style Stack!    Here's a quick flip-thru with no sound:


I put together a 8.5" x 11" spiral notebook with the help of my Cinch.

Here is how I did it, I punched copy paper, trimmed the front and back covers and decorated the front cover.  I added a strand of braided jute and die cut feathers out of self-adhesive cork.


Here's a quick glance at the back cover before binding.

I added a few rhinestones to the feathers to finish it off.  I know I say this about every stack I create with, but this stack has beautiful patterns and the copper foil is perfection!

The Boho Style Stack will be available at AC Moore Stores.  Thank you for visiting today.


Thursday, June 9, 2016

Dreaming Tree Blog Hop


Welcome to the 3rd stop of the Dreaming Tree blog hop!  I'm so excited to be participating in today's hop featuring Dreaming Tree's designs!  So let's get to it because I know you have things to and people to see, blog hops to hop, but before we start, if you want to start the hop from the beginning, please start with Michael

I chose to create with the crown design from Dreaming Tree's newest collection,  King of the Castle.
I used gold and brown shimmer paper.  The embossed pattern paper is from DCWV's The Treasures Stack.  


My intent was to leave the embossed pattern paper as is, but I broke out the Copper Kettle Metallic Lustre and the metallic Light Patina paint.  It completely changed the look and I love it.

I resized the crown to be worn by my Dad on Father's Day.  Here it is:

This photo captured the embossing, shimmer and the patina copper! 


I have a gift certificate to Dreaming Tree to giveaway to one lucky person!  Please follow my blog and leave a comment!!  Your next top is A THING FOR PAPER

UPDATE:  The winner of the Dreaming Tree $10 gift certificate is......... Comment #135

Claudia Brawley said...
I hope your dad enjoys being "King" of the day!

Claudia, please use the contact form tab to email me so I can send you the certificate.
DezinesbyEM FIRST STOP

Just Yolie ====== YOU ARE HERE

A Thing for Paper ====== YOUR NEXT STOP

Hola #Craftwell + #LatinaCrafter


Latina Crafter is sponsoring the Craftwell Team this month.  Please visit the blog to see what the team has created.  Today is my day to share and here is my card.

I've been creating 5"x5" square cards lately and I like it.  On today's square card, I used Latina Crafter's "hola" die, DCWV Classy Copper paper and Craftwell Cabbage Rose embossing folder.

I embossed the green pattern paper and cut the "hola" die from the foil copper paper.


I fussy cut the top accent floral print from a 4" x 6" cut-out sheet included in the paper stack.  Adhered the "hola" and the "thinking of you" strip. I used Glue Dots for added dimension and attached a tiny scallop ribbon to the bottom and seam binding ribbon on the top.  It's difficult to see, but the foil copper accents are beautiful.

Latina Crafter is currently celebrating their 5th anniversary and their shop is on vacation.  They are offering a 20% discount while they are away.  The offer is valid through June 13th.  Here is the discount code:  SUMMER2016

Friday, June 3, 2016

Father's Day #DCWV

June 3rd: I am determined not to scramble making last minute Father's Day cards.  So I made this card for one of my brothers for the DCWV June Stackaholic Sketch. {1 down 2 to go}
 The paper is from The Treasure Stack available at Michaels Stores.  As usual, there are 2 sketches you can choose to create or if you are feeling extra crafty, use both sketches.

Here is my card:


+
I punched out the keys and glued them down to the embossed "leather" paper.  I then matted the paper on black corrugated paper.  The license plate paper is glossy, but the camera didn't quite capture it.
I used my handy dandy label buddy for the greeting, added the strips to the tag and stapled jute.


Here is a look of the inside of the card.


I hope you join us this month.  Below are both sketches.  Thank you for stopping by today and enjoy your weekend.


Thursday, June 2, 2016

Celebra con #Craftwell & #LatinaCrafter

I don't know if you are aware, but the weekend is almost here.  Time to celebrate!

We are also celebrating this month's sponsor,  Latina Crafter's 5th Anniversary!
So today, I am sharing a the perfect card for the occasion.


I used Latina Crafter's Viewfinder die, "celebra" die and Craftwell Dotted Chevron embossing folder.  Everything cut and embossed with, you guessed it, the Cut N Boss.


Let's chat about the paper for a minute.  I received a box of catalogs not to long ago and this sheet was at the bottom of the box, printer's color box.  Of course I couldn't just toss it out.  I just knew I had to create with it and so it was perfect for my "celebra" card.  I trimmed it to fit the card base and then embossed it with the dotted chevron.  Simple as that.
I cut 2 "celebra" words to create a shadow so the yellow can pop.


I cut a blue circle for the viewfinder's background and embellished with enamel dots.  Such a fun and happy card! I love how it turned out.

Latina Crafter is currently celebrating their 5th anniversary and their shop is on vacation.  They are offering a 20% discount while they are away.  The offer is valid through June 13th.  Here is the discount code:  SUMMER2016