Saturday, February 25, 2017

Planner Meetup Goodie Bags #PlanListDecorate

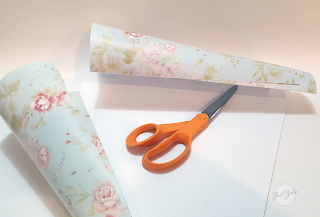
As mentioned on my previous post, here are the Planner Goodie Bags I made using DCWV Project Paper Vintage Roses.

There are plenty of tutorials on how to make bags out of gift wrap paper.
I rolled out 16" of paper and trimmed using Fiskars scissors.  I then fold it length wise at 11" and then trimmed again.

I folded the bottom at 3" to give me a larger base.


When I was ready to adhere the bottom, I made sure to add lots of adhesive, don't want the bag falling apart.

I trimmed the uneven top and then used Pink and Main's Scallop border die.  I used the Cut N Boss to cut scallop tops and  then added wire burlap lace ribbon to the top allowing the scallop edge to show.

I cut out the word Thanks from Pink and Main and added them to the bags with the clothespins.

Love how they turned out. 

Planner Meetup #PlanListDecorate

Today I am hosting my second Planner Meetup: Plan List Decorate.  My free event will be held at a local scrapbook store and I have scheduled a couple of fun planner make n takes.

Here is the first one, Planner Band:
I purchased the felt at Joann's and used Craftwell's Bow and Flower dies by Teresa Collins on the Cut N Boss.


The elastic bands are actually head bands I purchased on the dollar store.  The flowers and bows look so pretty!

Here is my planner sporting a new Planner Band with my favorite colors.


My second Make N Take is a Fun Fringe insert.  I used double sided paper from Photo Play Paper and attached the fun fringe. 
I taped it down with gold washi tape and used Pink and Main's Believe Script stamp set, one of my favorite sets.

We are also swapping planner accessories, stickers or handmade clips.  I made a sticker sheet that represents the essence of my Planner Meetups,  friendship.   I prefer smaller groups at my meetups, this way we can all engage in conversation, like you would at the dinner table.  My friends attend and it's always a blessing when I make new friends.  We share our organizational tips, craft supplies, planner tips and food.  The most important thing is establishing friendships.

I created the sticker sheet on Cricut Design Studio mingled with some of my designs.  I purchased the tins and personalized them gold foil vinyl with the names of my friends attending the meetup.  I can't wait to give these to them.


Thank you for visiting.  I will be sharing the goodie bags I made in a separate post.
Happy Planning!

Thursday, February 23, 2017

Easter Card #AJVD

It's almost Friday!  Today I am  sharing an Easter card I made using A Jillian Vance Design's  He is Risen stamp set and Three Calvary Crosses Die Set.

I took the left over scraps from a kit to create the card.   I die cut the Three Calvary Crosses on Kraft paper and glued it to the card allowing space for the white roses.  I then used the Cocoa dye ink to stamp the beautiful sentiment directly on the card base.
http://stores.ajillianvancedesign.com/three-calvary-crosses-die-set/

I then embellished with white sequins around the sentiment.

This is one of my favorite cards.  I hope you like it too. 
Before you leave, I want to invite you to visit the store.  Jillian has added new stamps, dies and accessories; Nuvo Crystal Drops, Gel Press....please visit and check them out!


Thursday, February 16, 2017

St. Patrick's Day Gift Card

Welcome! Today I have CAS card to share for St. Patrick's Day.

I used the Charming Spring and Summer Holidays Stamp and Die Set and the Mini Bag Mega Die Set.


The paper I used is single sided so I cut the Shamrock paper to line the inside of the Mini Bag.  I cut on the back side of the paper so it would align with the ridges of the Mini Bag.


I had planned on using the yellow shimmer paper for the top layer, but was a bit too yellow.  So I used a gold masking tape I picked up at the dollar store and washi tape.

I wrapped gold jewelry cording on the Mini Bag, added the green shimmer bow and attached the tag.
I stamped the sentiment with Prima's Color Philosophy ink pad Carrot, then used the circular tag die to cut.  I colored the tag with Tombow brush tip markers and added a bit of sparkle with Crafter's Companion Sparkle Clear Marker.

The sentiment reads, " Lucky, Lucky, Lucky to have a friend like you"


I hope you enjoyed the card and thank you for visiting today.


Tuesday, February 14, 2017

Happy Love Day!

Happy Love Day!  My sister asked for 40 Valentine cards last week and here they are:


I used the Rose from Dreaming Tree's I Love You bundle and cut them on various Valentine paper along with DCWV Cardstock.


If you follow me on Facebook and/or Instagram you know I love clearance shopping.  Well, I scored a pack of Recollections Value Pack of Cards and Envelopes for $2.50.   They measure 5" x 6.5", a bit big per my sister's request, so I cut them in half, trimmed at 3.25".  But before I did, I printed the greeting inside the cards.

I then embossed the front cover with Teresa Collins' heart embossing folder.  Easy peasy.  I was then ready to trim them at 3.25".  Wait!  There was a hiccup with the envelopes!  They were now smaller cards and no envelopes!  No worries, I searched my basket for glassine envelopes and again, my hoarding skills payed off.  I found 2 packs of floral bags I purchased at Daiso.  Yay!  Perfect fit!


My assembly line was rockin'!  Here are all the Roses, lovely!

Various designs, oh so pretty!


My sister's co-workers also got a special treat with their Valentines, Ghirardelli chocolate! Yum!

I hope you enjoyed the project today, Happy Love Day!


Friday, February 10, 2017

Pink and Main February Release Hop


Welcome to Pink and Main's February Release Blog Hop, I am your last stop, but if you want to start from the beginning, please start with P & M's blog.

I created my first card using Scentsational stamp set with coordinating dies.  I also used the Scallop Circle Dies and Stitched Circe Dies to create the flowers.  I used the tree trunk die as a talk bubble and stamped the sentiment.


Up next, I used the NEW Candid Moments stamp with coordinating die set.  I also used the Smile die set.


Please leave a comment at all stops to qualify for the giveaways.  I will be giving away the Candid Moments stamp set to one random winner.  Please leave a comment below.

Here is the complete line up.

Yolie

Thursday, February 9, 2017

Vintage Rose

I'm on a bit of a vintage vibe, so for today's card I used Crate's Paper and AJVD Beautiful Rose Die to create a pretty vintage card.

I used a red lace pattern paper to cut the base of the rose and various pattern papers to cut the banner die cuts.


I layered the banner cuts and trimmed a border out of the yellow lace pattern and then layered more of the banner cuts on top of that.  I cut the outline of the rose on brown paper and cut an extra rose on a green pattern paper to inlay the leaves.  I wanted a red rose, so I used the lace pattern paper to cut the base of the rose.


When I removed the word "beautiful" from the cutting plate the counters of the letters didn't fall off, I kind of liked that, so I carefully added glue to the backside and kept it as is.  I then embellished with flower buttons and sequins.


I hope you enjoyed my pretty vintage card today and I thank you for taking the time to look.


Saturday, February 4, 2017

Glimmered Valentine

February is here, time to get started on those Valentines.  Hello and welcome, I'm sharing a fast and easy card.

I gathered a few supplies; Tattered Angels' Glimmer Mists and paint.  I used the Simply Said: Love Struck, Authentique sticker sheet, gold floss and watercolor paper.


I removed the printed clear sheet and placed it over the sticker label, just to make sure it was going to fit. 

Not shown,  I lightly sprayed the watercolor paper, then I cut a heart out of a paper towel, it's what I had on hand, then sprayed the Glimmer Mists and paints.

Difficult to capture the glimmer on camera, but it really does look gorgeous.


I stamped the sentiment on the sticker, added several pop dots, added the gold floss and it was done.  That fast and easy.  


I hope my card inspired you to bring out the paints and get messy.  Thank you for visiting!