Since my last post 5 years ago, a lot has changed! I still love making things and playing with paper, stamps, and junk journaling. I even started my own small business, The Maker Session, where I sell all sorts of fun crafting supplies on my website. My most popular item is the Dauber Wands - they were even featured in Jennifer McGuire's Crafty Gift Guide 2023! It's been quite the ride running a small business, but it's been a fun and exciting journey. There have been ups and downs, but I wouldn't trade the experience for anything. I also love traveling so combined it with traveling to stamp shows throughout the states with my husband, and meeting other passionate makers along the way!
Make sure to check out The Maker Session on Instagram and drop by a stamp show, swing by my website for the most up-to-date schedule!

 |  |  |  |  |
Wednesday, August 28, 2024
It's been a minute
Wednesday, December 4, 2019
Tammy Tutterow NEW STAMP RELEASE
The new Tammy Tutterow stamp collection is available! They are available to purchase through The Makers Movement's website. I am super excited to be creating with the new release
I used the Little Feet Stamp set and Nested Round Tags to create a welcome baby card.
I gathered pink pattern paper, shimmer gold paper, foil gold paper, pink and white card stock.

I used the medium size Rounded tag to cut a white card stock. I stamped the baby girl shoes with a very light pink ink.

I used the small tag to create a scallop square to stamp heat emboss the "Special Delivery" in rose gold. To create the square, I simply cut the tag, then turned the die to create the scallop square. I did the same with the pink card stock to create a nested back ground

I heat embossed the girl onesie with gold embossing powder and colored it pink. I then layered the tags, using a few pop dot adhesives for dimension.

I used a gold jewelry string and tiny gold dome gems to embellish. It turned out so cute!

If you want a close look at Tammy's new release, follow her Facebook page. She will do Facebook Live on Friday, December 6 at 12pm CST to introduce you to the new collection of stamps and dies.
Make sure you check my blog again soon! I will have more projects to share. Thank you for visiting today.
Monday, November 18, 2019
Christmas Rosettes
I created a few layered rosettes to decorate a gift bag or to top off wrapped Christmas boxes. A fun alternative to bows.
To make the rosettes, I used two strips of paper measuring 2" wide x 12" long. I scored each strip at every 1/2".
Glue the ends to make a large ring.

Next, cut a 2" circle add glue and flatten the ring and gather into the center to form a rosette. Holding the rosette by the center, quickly adhere the prepared 2" circle of glue to the backside of the rosette. Hold in place until the glue dries.

Add your favorite die cut to the center of the rosette.

I added a scallop circle to the backside or you can layer another larger rosette on the bottom.

These gift topper rosettes were so much fun to create and they came together so quickly. Give them a try.
Tuesday, October 8, 2019
Altered Pumpkins - Plaid Crafts

I used Plaid's Colorshift Purple Flash, Dragonfly Glaze in Green & Gold, Glitterific Purple, Folk Art Treasure Gold and Turquoise acrylic paint.

The purple pumpkin got two coats of Colorshift in Purple Flash, drying time took a little longer but so worth it! I then used the Glitterific in Purple for the top of the pumpkin. I added Rita's Mermaid die cut with hot glue and then added the flowers.

I used purple roses and purple pearls to decorate throughout the pumpkin. The Colorshift and Glitterific looks amazing!

The turquoise also got two coats of Plaid acrylic paint in Turquoise. After it completely dried, I applied one coat of the Dragonfly Glaze in Green and Gold. After the glaze dried, I used a dry brush to apply the Folk Art Treasure Gold. I then added the gorgeous mermaid and scattered fabric, paper and resin flowers throughout the pumpkin.
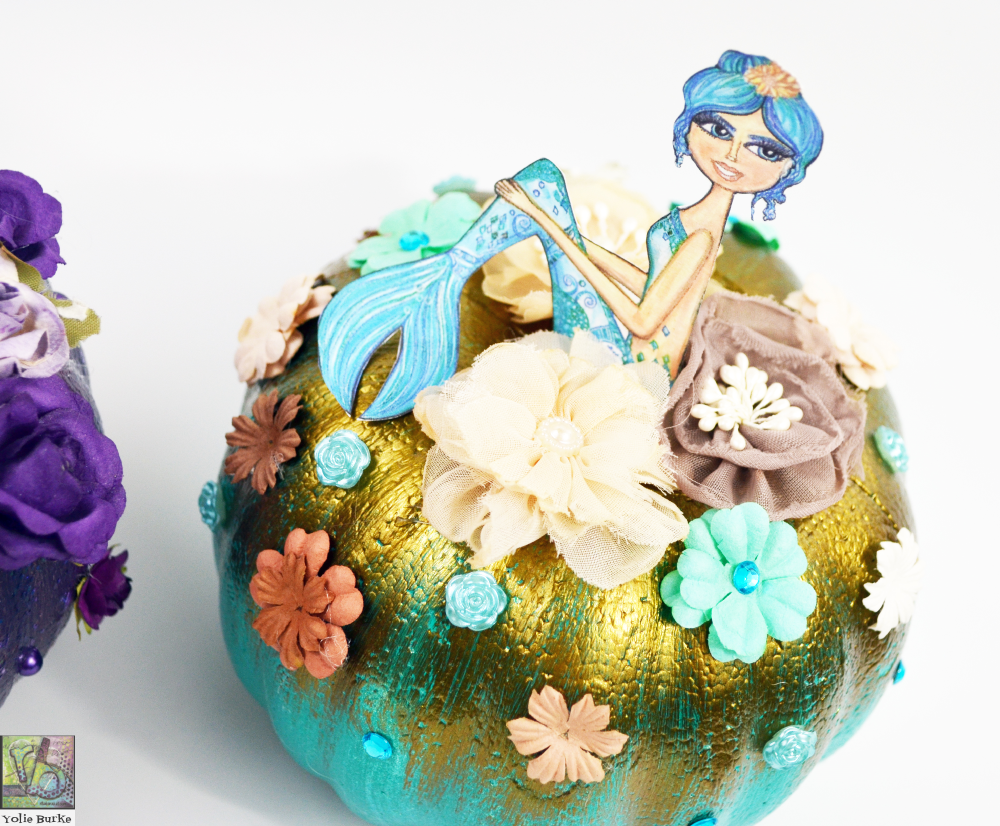
I'm so loving how the mermaid theme pumpkins turned out!

Thursday, September 19, 2019
Style Tech Craft + Designer Crafts Connection Blog Hop

Make sure you visit the Designer Crafts Connection blog for the list of blogs to visit.
For my vinyl project, I used several colors of the Ultra FX vinyl to create a layered sugar skull design. I used the Cricut Maker to cut the sugar skull for a Día de los muertos glass jar. The most difficult part of my project is choosing the colors! So many beautiful colors to choose from. You can find the color chart here.

In Design Space, I separated the layers and changed the colors to match the vinyl. I trimmed the Styletech Craft vinyl sheets to fit the size of each layer and prepared to cut.

I weeded each layer and used Styletech Craft's transfer tape to place each layer on the jar.

Once I had the last white layered in place, I kept the transfer tape and burnished the design and removed a few of the air bubbles.

In this photo you can see the glitter on the vinyl.


Thank you for stopping by and remember to stop by the Designer Crafts Connection for the next link.
Subscribe to:
Posts (Atom)