Monday, April 30, 2018

Drive By Crafts and Pink & Main


This week we are blogging with Pink & Main YAY! with lots of great inspiration from the Drive By Crafts and Pink & Main design team members.... and we also have a couple of blog prizes to giveaway. 

Two winners will be chosen. One person will win the DBC gift card and one person will win the stamp sets from Pink & Main. 

Now onto my card, I used the Sticky Note stamp set and layered the images with the help of the MISTI stamp positioner, also available through Drive By Crafts. If you haven't already visited the shop, you will find a good selection of stamps, paper, inks and lots more under one roof.


I stenciled the background and colored the image with markers. I fussy cut the images with Westcott's non-stick mini scissors and added bits of washi tape before adding the images with pop dots.


I then finished off the card with twine and sequins.


Don't forget about the giveaway, here are the rules:

Enter to win....
  • Leave a comment on this post
  • Leave a comment on the Pink & Main blog HERE.
  • Follow DBC on Instagram HERE (leave a comment here after)
  • Follow Pink & Main on Instagram HERE (leave a comment here after)
  • Like DBC on Facebook HERE (leave a comment here after)
  • Like Pink & Main on Facebook HERE (leave a comment here after)
That's 6 times you can enter to win plus if you come back each day this week and comment that will give you bonus entries to win. 

Winner's will be announced on May 7th on the Drive By Crafts blog. You have until May 6th at midnight PST to enter to win these fabulous prizes. 

Tuesday, April 24, 2018

Wedding Shower Favors

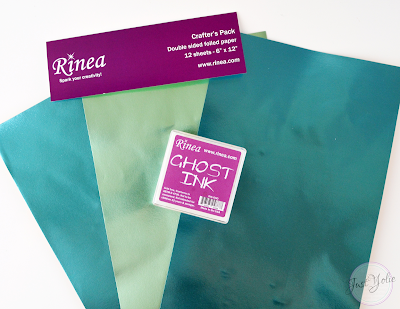
With wedding season upon us, I made wedding shower favor bags that can be easily mass produced. I used Rinea's Turquoise/Gold Glossy Foiled Paper Crafter's Variety Pack and Ghost Ink.

Supplies:
I used the smaller tag die to cut the Turquoise/Gold Glossy foiled paper and the larger tag die to cut the white card stock. I then used the scraps of the Turquoise/Gold Glossy foiled paper to cut the mini bows.

.
I stamped the groom and bride image with Ghost Ink, allowed the ink to dry and then gently removed the ink with a baby wipe. Next, I added adhesive to the white card stock tags and placed the stamped tag on top.


I used hot glue to assemble and adhere the bows to the favor bags. I had gathered up some white enamel dots to embellish, but that mini gold bow is all it needed.

After adding the treats, I folded a doily in half and placed in the bag in lieu of tissue.


Thank you for visiting and happy crafting.

Friday, April 13, 2018

Remember When Blog Hop


Welcome to the "Remember When...Blog Hop. We are featuring projects made with our "old" scrap stash. So let's get started.
I remember when the i-Top Tool was introduced and I had to have it! It was introduced about 8 years ago by Imaginisce, now American Crafts. You first punch the paper, shape to the dome of the button, insert it to the tool and add the bottom and press it together. There is a similar tool in the fabric section of your local craft store that makes fabric buttons in a similar way.

The beautiful soft colors of Heide Grace's Daydream was a must have back in '12. It was made by Colorbok and was carried in Joann Stores.
Now about the stamp, I purchased about 4 years ago, but it was released on or about '11 by Stampin Up.  It's one of the cutest QuinceaƱera stamps I have. 


Here is the bilingual QuinceaƱera card I made. Check out the close up of the i-Top button.

It was fun searching through my "older" scrappy stash. I really enjoyed creating again with Heide Grace paper and the i-Top tool.
Thank you for stopping by your next stop is It's Oddly Appealing

Monday, April 9, 2018

Floral Headbands with Rinea

 April Showers bring May Flowers and in this case, Rinea Pom Pom Flowers. I used the 3D Rolled Star Die Set and the Peacock Foiled Paper Variety Pack to make a couple of flower headbands.


I used the small and medium 3D Rolled Star Dies to create the pom pom flowers and used the Starstruck Violet, Emerald and Sapphire. I cut 3 sheets at a time for a total of 6 layers per flower. I then gently folded each petal and adhered each layer with hot glue. I purchased a set of 6 headbands at my local dollar store, making this project not only fast and easy to make, but affordable.


I added the hot glue to the headband and added the large flower first. I then added the smaller flowers on each side.


I love the vibrant colors and the pom pom flower is quickly becoming one of my favorite flower to make.


Thank you for visiting and happy crafting.

Supplies:

Monday, April 2, 2018

Stamping for Autism Blog Hop

Pink and Main is participating in a Blog Hop. Here is the card I made.

I stamped the boy image from Birthday Kids and colored him with Leisure Arts coloring pencils. I used Westcott scissors to fussy cut the image and removed the balloons.

I die cut the heart puzzle and ran them through Xyron Create Sticker.

I stacked the heart puzzles and then added the sentiment and image. I stamped the "you're so awesome" using two different stamp sets; Hello Sweet and Awesome Family. He is holding a small puzzle heart and puzzle piece from the To Pieces stamp set.

I finished it up by wrapping green twine and I love how it turned! I hope to see your project linked up.
Thank you for stopping by.