Monday, November 18, 2019

Christmas Rosettes

I created a few layered rosettes to decorate a gift bag  or to top off wrapped Christmas boxes. A fun alternative to bows.


To make the rosettes, I used two strips of paper measuring 2" wide x 12" long. I scored each strip at every 1/2".
Glue the ends to make a large ring.

Next, cut a 2" circle add glue and flatten the ring and gather into the center to form a rosette. Holding the rosette by the center, quickly adhere the prepared 2" circle of glue to the backside of the rosette. Hold in place until the glue dries.


Add your favorite die cut to the center of the rosette.

I added a scallop circle to the backside or you can layer another larger rosette on the bottom.

These gift topper rosettes were so much fun to create and they came together so quickly. Give them a try.


Tuesday, October 8, 2019

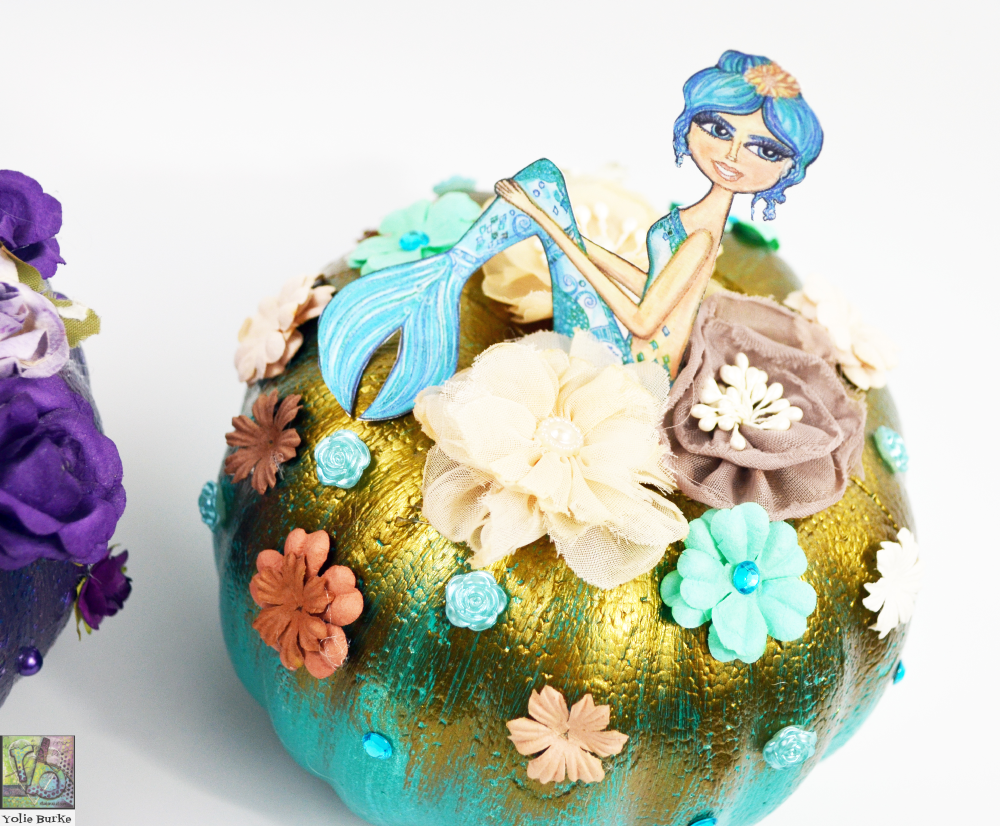
Altered Pumpkins - Plaid Crafts


'Tis the season for everything pumpkin! I love all the non-traditional colors and themes used to decorate pumpkins. And since it's always mermaid season, I decorated a couple dollar store pumpkins using Rita's Mermaid Tails ephemera.


I used Plaid's Colorshift Purple Flash, Dragonfly Glaze in Green & Gold, Glitterific Purple, Folk Art Treasure Gold and Turquoise acrylic paint.

The purple pumpkin got two coats of Colorshift in Purple Flash, drying time took a little longer but so worth it! I then used the Glitterific in Purple for the top of the pumpkin. I added Rita's Mermaid die cut with hot glue and then added the flowers.

I used purple roses and purple pearls to decorate throughout the pumpkin. The Colorshift and Glitterific looks amazing! 

The turquoise also got two coats of Plaid acrylic paint in Turquoise. After it completely dried, I applied one coat of the Dragonfly Glaze in Green and Gold. After the glaze dried, I used a dry brush to apply the Folk Art Treasure Gold. I then added the gorgeous mermaid and scattered fabric, paper and resin flowers throughout the pumpkin.

I'm so loving how the mermaid theme pumpkins turned out!


Thursday, September 19, 2019

Style Tech Craft + Designer Crafts Connection Blog Hop

The holiday craft season is here and today the Designer Crafts Connection have teamed up with Style Tech Craft for an amazing blog hop.
Make sure you visit the Designer Crafts Connection blog for the list of blogs to visit.

For my vinyl project, I used several colors of the Ultra FX vinyl to create a layered sugar skull design. I used the Cricut Maker to cut the sugar skull for a Día de los muertos glass jar. The most difficult part of my project is choosing the colors! So many beautiful colors to choose from. You can find the color chart here.


In Design Space, I separated the layers and changed the colors to match the vinyl. I trimmed the Styletech Craft vinyl sheets to fit the size of each layer and prepared to cut.


I weeded each layer and used Styletech Craft's transfer tape to place each layer on the jar.


Once I had the last white layered in place, I kept the transfer tape and burnished the design and removed a few of the air bubbles.


In this photo you can see the glitter on the vinyl.


Thank you for stopping by and remember to stop by the Designer Crafts Connection for the next link.


Tuesday, September 10, 2019

DIY Traveler's Notebook

I created a book journal for my Fall reading. I stamped on canvas fabric using Plaid Fabric Creations™ Paint. I also stamped a few of the header banners from Finders Keepers Jots & Dots: This Week stamp set.


I allowed the fabric paint to dry and then heat set it before sewing the journal cover.

 I sorted through the Libris paper crafting kit and the Jots & Dots: Dot Grid Notebook.

I made the Sing canvas cover a B6 size and the Jots & Dots Notebook was bigger, but no worries. Grabbed my handy dandy seam ripper and carefully ripped through the binding. I trimmed the notebook to fit the B6 journal cover and sewed it right up.

First I decorated the notebook cover with the stickers included in the Libris kit. I also Scrapbook Adhesives Metallic Transfer Foil Sheets to add some fun foil accents throughout the pages.

I added a pocket to store the library card cut outs from the kit. Added some fun quotes, stickers, foil and stamped through out the notebook. 
Here are a few of the pages:


Here is the front and back over of the Sing book journal cover turned out:


Saturday, August 24, 2019

Mermaid Journal

Yay! Excited to be doing another giveaway!! This round is for a bundle of large metal pieces. These can be used for journal covers, home decor pieces etc.

These were given to me when I was with U-Paint Metal Crafts. Here is one of my favorite projects I created with their amazing Mermaid! Unfortunately, the company is no longer around, but here is a chance to win some of their metals!


This metal bundle has 20 pieces! If you are interested, just leave a comment below.
I will choose a random winner on September 1st. The winner will be announced on this post. 
Please note, this giveaway is only open to US residents.