Friday, February 9, 2018

Thank you mini gift set with #Rinea

Did you know the 3D Rolled Star Die Set makes a beautiful flower? Let me show you how. You will need 2 sheets of the Gold/Gold Glossy Foiled Paper in 6" x 12" and the small 3D Rolled Star Die, full list of supplies listed below. Cut 12 pieces of the small 3D Rolled Star Die on the Spellbinders Prizm die cutter, then fold each "petal" in half. Using the hot Glue Pen, adhere each layer in the center. Then fluff the petals to create a pom-pom flower.


I cut out the word "Thanks" using the scraps from the "flower" and created a small note card.


I added a strip of Gold/Gold Glossy across the box and glued the pom pom flower to the top of the mini gift box.

This little thank you gift set is ready! To create the box, please follow the origami instructions here.


I hope you enjoyed my pom pom flower. What will you create? A 3D Rolled Star or a pom pom flower?
Thank you for visiting and happy crafting.


Supplies:

Tuesday, January 30, 2018

Valentine's Day Mason Jars with Rinea

  Here is a quick way to spruce up your Valentine's Day party. I decorated ceramic mason jars using Rinea's Love Variety Pack.


I took one sheet of the Starstruck Fuschia and cut 2 3/4" strips. I then trimmed the heart pattern paper and cut 1 3/4" strips. Apply Helmar's Craft and Hobby PVA Glue and adhere. Then apply a thin line of glue to the heart border and carefully place it on the the pattern paper.
I die cut the hearts, and the "xo" on Glossy/Fuschia and the large stitched heart on Glossy Blush/Gold foiled paper.  I found it easier to wrap the strip to the mason jars first, then apply the die cut borders.


Then wrap pink twine around the rim of the mason jars.

Add Helmar's Glue to the back of the gold heart and carefully center it onto the pink heart. Next add  a line of glue onto the straw, about 2" down from the top and glue the layered hearts to the straw.


It truly is an easy way to decorate for your Valentine's Day party or GALentine's Day gathering.


I hope you enjoyed my DIY Valentine's Day party idea. We love to see what you create with the Love Variety Pack! Please share your projects on our Facebook page.


Thank you for visiting and happy crafting.
Supplies:

Tuesday, January 9, 2018

Traveler's Notebook Inserts with Rinea

Celebrating GALentines or Valentine's this year? Here is a quick gift idea; I made a set of journals using the Love Variety Crafter's Pack.


Each journal has 20 pages. First, trim 5 sheets of pattern paper and plain paper to 8"h x 10"w. I used a mix of graph paper and sketch paper in between the pattern papers. Score each at page at 5".
Arrange your 10 pages and secure with binder clips. Staple in the center, top and bottom. If you are sewing the binding, below is a quick tip.


To help keeping a straight stitch, I used a strip of washi tape slightly off the score line to help as a guide.

.
Next, using a ruler, trim off the excess with a rotary cutter.

I trimmed a 3" strip of the Pink Starstruck Foiled paper and used a scallop die to create a pretty edge. I used the larger scallop die edge on the Glossy Gold Foiled paper.

I glued the foiled papers with Helmar's Craft & Hobby PVA Glue to adhere the borders to the binding. I also die cut a few stitched rectangles on the Gold Glossy Foiled paper and added a the sentiments and macoroon image.

I bundled the trio with black & white twine. They are now ready for gift giving.


Thank you for visiting and happy crafting.


Supplies:
  • Rinea Love Variety 6" x 12" Crafter's Pack
  • 12" x 12" scrapbook paper
  • Writing Paper or printer paper
  • Paper Trimmer
  • Scallop dies or paper edge punch
  • Helmar Craft & Hobby PVA Glue
  • Rotary Cutter
  • Ruler
  • Sewing Machine or long reach stapler
  • Twine

Saturday, December 16, 2017

Christmas Planner Meetup #PlanListDecorate

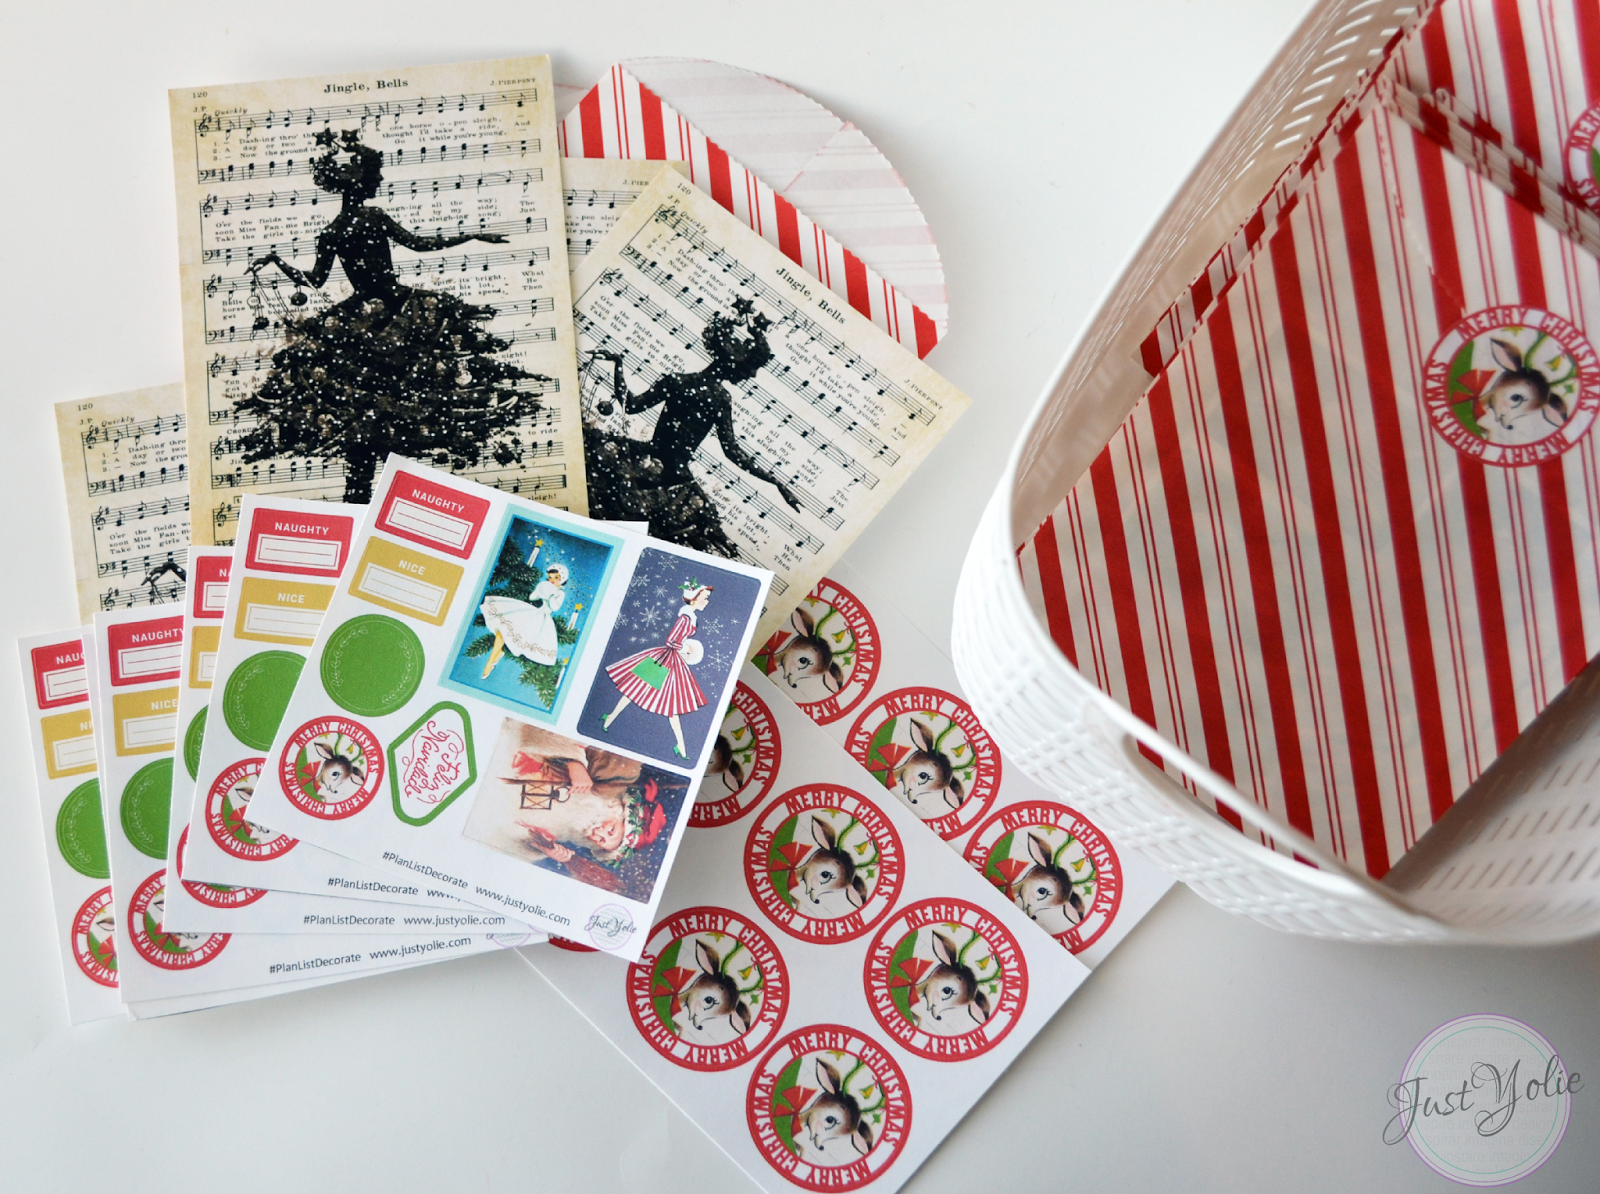
Today I am hosting a planner meetup for 36 planner girls. This is my last planner event of 2017, but I am so excited to see my crafty planner friends before Christmas. Here are the planner swaps I made for them.


I went with a vintage Christmas and loved how everything turned out. The sticker sheets are so adorable and I am so impressed with Cricut's Design Studio. They have made major improvements to their program.
I used a couple of images from Design Space to create the cute Christmas Deer and the Feliz Navidad stickers, so cute!


I love the vintage ladies, but this right here is my favorite! I am so thrilled how this postcard that can be used as a dashboard, journal card turned out!!

I enjoyed designing these for my planner friends, I sure hope they love them!

Saturday, December 2, 2017

Planner Dashboard Shakers #planlistdecorate

Today, I am attending a local planner meetup and I am participating in their swaps. I purchased the felt Christmas tree as Hobby Lobby to make the paper clips.
I used large red paper clips and Westcott's Glue Pen to adhere them to the clips.

I then dusted off the Fuse by We R Memory Keepers to create dashboard shakers. The planner dashboard shakers are sized to fit an A5 planner or larger.

Look at these planner goodness! I'm so proud to have completed them earlier in the week and not late last night. {smile}

I added a strip of washi tape to the left side where they will get punched according to the recipients planner system. I added pattern paper to dashboard, fuse it, then added the shaker pockets, fused them and included a pack of cocoa. I then adhered the candy cane with a strip of washi tape and added the Christmas tree planner clip to the top.
I hope the planner girls enjoy them as much as I enjoyed making them. Thank you for visiting.