I searched the images in Cricut Design Space and found a free phone decal image perfect for the zipper pouch.
The image is winking however, I want a face with both eyes closed so I modified it using Design Space features. Below is the complete tutorial. Let's get started.
Click on the image to select and click "insert image". The image will be added onto your canvas.
I started with her lips. I wanted her lips slightly open so the first step is to "ungroup" the image. Then select the lips and make a copy. Resize it by unlocking the proportion feature. I want to elongate the copy of the lips to create a opening on her mouth. Change the color to white and center it on the middle of the mouth. Then select both and click "group".
I want both eyes to be closed, using the "contour" feature, I hid the left eye. I then selected the right eye and made a copy. Next, I aligned it and then flipped it horizontal.
Now this is the face I want! So cute! We are almost done.
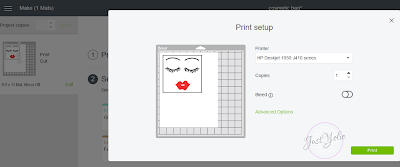
Next, select the face and make a copy. Select the copy and choose "flatten". We are going to to use the Print & Cut feature to print copy to help with the placement of the cut vinyl onto the pouch.
Print a copy and then cancel the "cut". We only need the paper copy.
Now we are ready to cut the iron-on. I don't like to waste vinyl, so I ungrouped the eyes and placed them as close as possible. I then used the "attach" feature to prepare for cutting and clicked on the attached image to get the size. I use this measurement to cut the black glitter iron-on. I repeated the same steps for the lips.
Using scissors, I trimmed the eyebrows and eyelashes, then weeded the unwanted vinyl. I used the printed copy of the face as a guide to place the vinyl. Prepare the iron to the high setting, cover the vinyl with a cloth, add enough pressure and iron-on vinyl for 30 seconds.
She's a beauty! Glittery eyebrows, eyelashes and high gloss lipstick!
She needed a little something so I added a red pom pom.
As part of the Best Creation Inc. Creative Team, I received the vinyl free, but I do have a discount for you to use. Click on the image below to shop and use the code for your savings.
Thank you for stopping by.


No comments:
Post a Comment