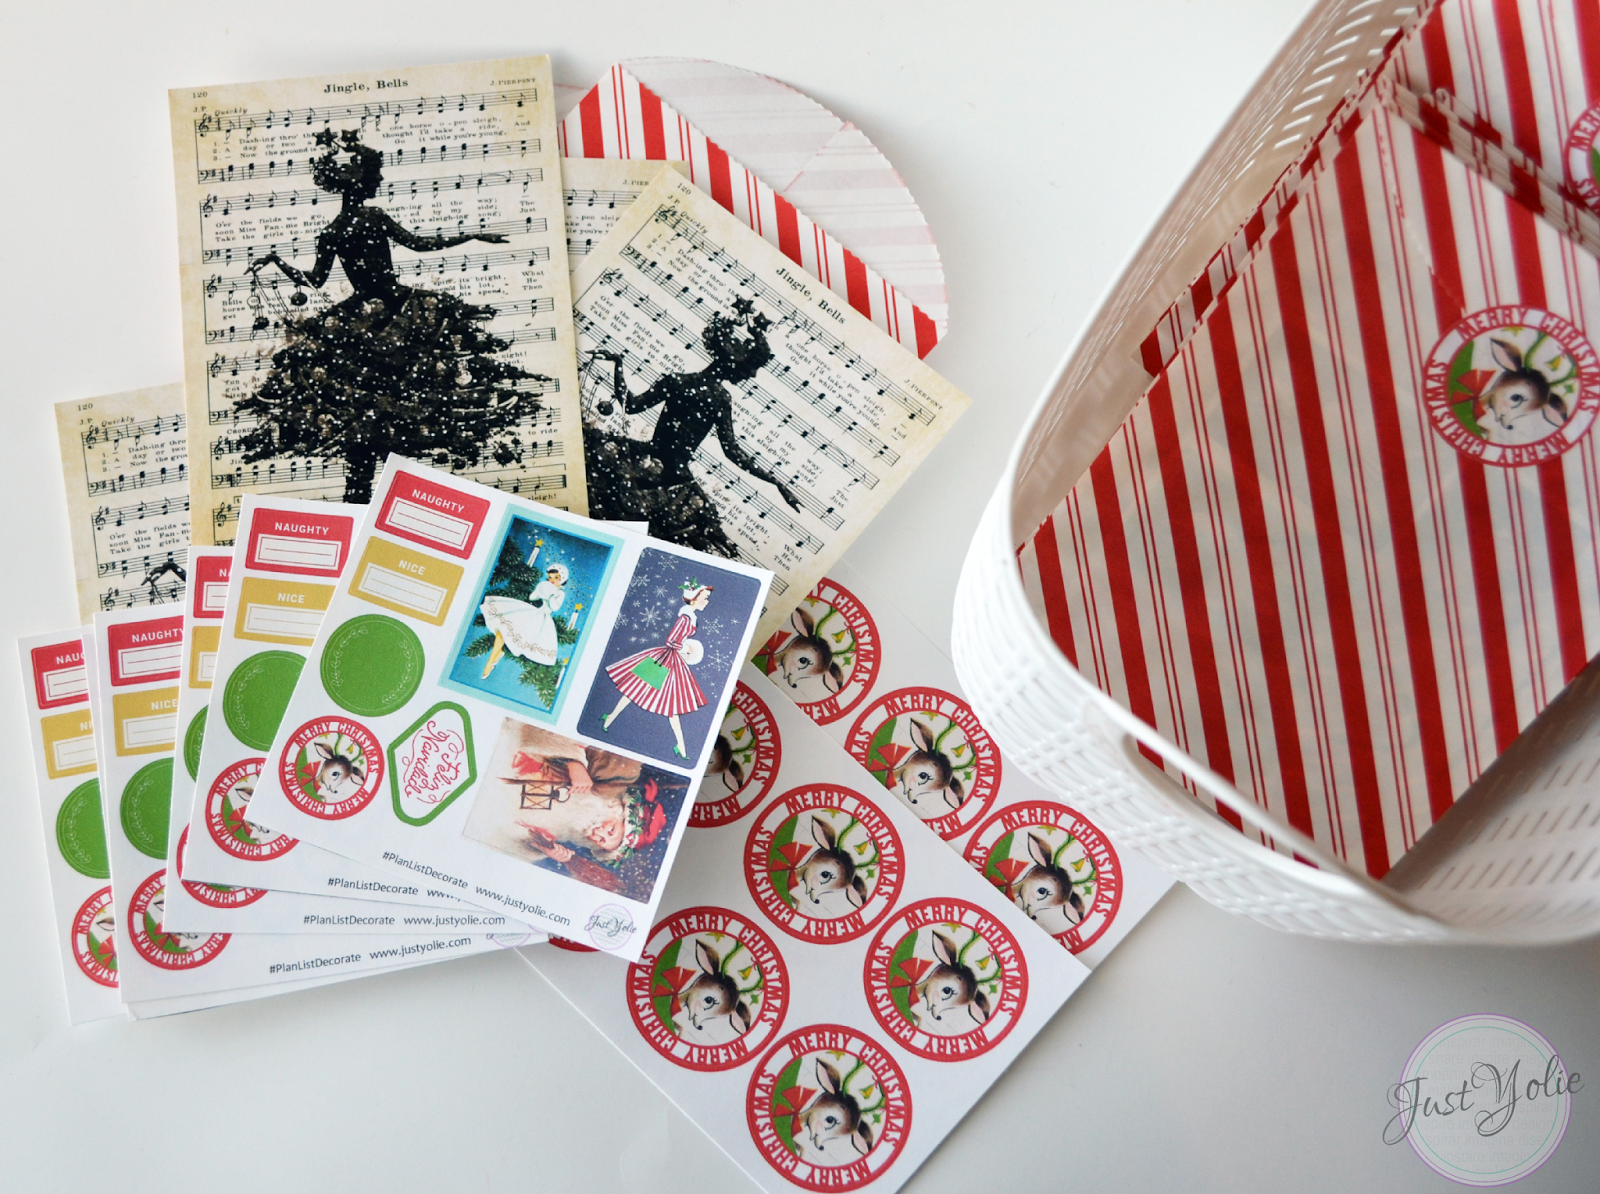
Today I am hosting a planner meetup for 36 planner girls. This is my last planner event of 2017, but I am so excited to see my crafty planner friends before Christmas. Here are the planner swaps I made for them.
I went with a vintage Christmas and loved how everything turned out. The sticker sheets are so adorable and I am so impressed with Cricut's Design Studio. They have made major improvements to their program.
I used a couple of images from Design Space to create the cute Christmas Deer and the Feliz Navidad stickers, so cute!
I love the vintage ladies, but this right here is my favorite! I am so thrilled how this postcard that can be used as a dashboard, journal card turned out!!
I enjoyed designing these for my planner friends, I sure hope they love them!
Saturday, December 16, 2017
Saturday, December 2, 2017
Planner Dashboard Shakers #planlistdecorate
Today, I am attending a local planner meetup and I am participating in their swaps. I purchased the felt Christmas tree as Hobby Lobby to make the paper clips.
I used large red paper clips and Westcott's Glue Pen to adhere them to the clips.
I then dusted off the Fuse by We R Memory Keepers to create dashboard shakers. The planner dashboard shakers are sized to fit an A5 planner or larger.
Look at these planner goodness! I'm so proud to have completed them earlier in the week and not late last night. {smile}
I added a strip of washi tape to the left side where they will get punched according to the recipients planner system. I added pattern paper to dashboard, fuse it, then added the shaker pockets, fused them and included a pack of cocoa. I then adhered the candy cane with a strip of washi tape and added the Christmas tree planner clip to the top.
I hope the planner girls enjoy them as much as I enjoyed making them. Thank you for visiting.
I used large red paper clips and Westcott's Glue Pen to adhere them to the clips.
I then dusted off the Fuse by We R Memory Keepers to create dashboard shakers. The planner dashboard shakers are sized to fit an A5 planner or larger.
Look at these planner goodness! I'm so proud to have completed them earlier in the week and not late last night. {smile}
I added a strip of washi tape to the left side where they will get punched according to the recipients planner system. I added pattern paper to dashboard, fuse it, then added the shaker pockets, fused them and included a pack of cocoa. I then adhered the candy cane with a strip of washi tape and added the Christmas tree planner clip to the top.
I hope the planner girls enjoy them as much as I enjoyed making them. Thank you for visiting.
Thursday, November 30, 2017
Merry Celebration!
The WOW design team are excited to be sharing our collab with the fabulous Pink & Main team that is now available in our store. To celebrate the new products to the store we are having a fun Blog Hop. Set yourself up by getting a cup of your favorite beverage and enjoy the inspiration the design team has to showcase using the Pink & Main products.
We have also invited along the Pink & Main design team so you have double the inspiration!
Be sure to visit each blog and leave a comment to be entered to win!! We will be giving away a $25 US or £25 sterling gift card to the WOW Store. The winner will be posted on our blog 31st December on the WOW Blog.
You should be arriving from Kate's Blog.
If you want to start from the beginning, please start at the Wow! Blog. The full list of participants is at the end of this post. For my card, I started by cutting the Layer Striped panels and creating a frame with the Square Stitched dies.
Next, I used the Merry Christmas stamp and die set. I cut the the background and then stamped "Merry Christmas" with Wow! embossing ink. I then sprinkled a generous amount of Metalline Violet embossing powder.
Next I stamped and die cut a couple of snowflakes using the Snow Flurries stamp set and Pink & Main's Night Sky Surface Ink.
I used scraps of paper from Frosty 6" x 6" paper pad to create a the card base. Here is the completed card:
Thank you so much for hopping, your next stop is Pam.
1. Blog hop starts @ WOW
2. Laurence Colling
3. Jo Herbert
4. Riikka Kovasin
5. Susanne
6. Kate Crafts
7. Yolie YOU ARE HERE
8. Pam Pease
9. Pam Mackay
Saturday, November 25, 2017
Christmas Foiled Banner #RineaInspires
Thanksgiving is officially over, it's all about Christmas, cue the jingle bells.
Today I am sharing a festive Christmas banner using Rinea's foiled paper and 3D Rolled Stars.This is the first time creating the 3D Rolled Star Die Set. Assembling the Stars was easier than I thought. The die set comes with 3 different die sizes. I cut 1 of the large and 2 each of the smaller ones. The easy to follow instructions are including in the package.
Following the package instructions, I rolled each piece and adhered using my Glue Pen.
I added a the Starstruck Foiled paper to each banner, just enough to give it a layered look.
Th 3D Rolled Stars be assembled in so
many variations. Create ornaments, bows, embellishments etc. I simply
love how they look on my banner and I hope you do too.
Thank you for visiting and happy crafting.
Supplies:
- Rinea Ruby/Gold Glossy Foiled Paper 6" x 12" Crafter's Pack
- Rinea Emerald/Gold Glossy Foiled Paper 6" x 12" Crafter's Pack
- Rinea Ruby/Ruby Starstruck Foiled Paper 6" x 12 Crafter's Pack
- Rinea Emerald/Emerald Starstruck Foiled Paper 6" x 12 Crafter's Pack
- Rinea 3D Rolled Star Die Set
- Manual die cutting machine
- 8.5" x 11" pattern paper
- Westcott Scissors
- Tulle
- Doilies
- Westcott Glue Pen
- Tape runner
- Jute
Friday, November 17, 2017
Traveler's Notebooks by JustYolie
Yes, I am so excited! I have been sewing all week. Sewing fabric traveler's notebooks! I will be launching my shop soon, but if you are interested in one or two, please contact me.
Here are the details:
Standard size fabric traveler's notebook cover.
Silver eyelets, 2mm elastic, two strands.
Finished size, closed: 8.5" x 5.5"
Finished size, open: 8.5" x 11"
Recommended inserts: 8.25" x 4.25", not included.
Price: $25.00 each
Payment: PayPal Friends & Family Only
Shipping: buyer pays actual shipping; U.S.A address only.
Thank you so much!
Handmade by Yolie Burke aka JustYolie
Subscribe to:
Posts (Atom)


